Butterfinger Chocolate Truffles
Introduction:
What if your recipe could recreate the crunchy, peanut-butter-forward magic of a Butterfinger bar in bite-sized truffle form—and do it in under 90 minutes while delivering a show-stopping texture contrast that most homemade candies miss? Google Trends and seasonal search patterns make one thing clear: searches for “homemade truffles” and “copycat candy recipes” spike around holidays, and this Butterfinger Chocolate Truffles recipe is built to capture that interest with minimal fuss, maximum crunch, and dependable results whether you’re an experienced baker or making candy for the first time.
Ingredients List:
- 12 oz (about 340 g) crushed Butterfinger bars or Butterfinger-style candy pieces (substitute: 10–12 oz crunchy peanut-butter candy or crushed toffee for similar texture) — the candy’s flakiness is central to the truffle’s character.
- 8 oz (225 g) full-fat cream cheese, softened (substitute: light cream cheese for slightly fewer calories, or mascarpone for richness)
- 2 tsp pure vanilla extract (enhances depth)
- Pinch of fine sea salt (balances sweetness)
- 12 oz (340 g) semi-sweet chocolate chips or couverture for coating (substitute: dark chocolate 60–70% for less sweetness or white chocolate for a sweeter, contrasting shell)
- 1 tbsp neutral oil or coconut oil (optional — for glossier coating)
- Optional garnish: extra crushed Butterfinger, flaky sea salt, or cocoa nibs
Sensory notes: crushed Butterfinger provides a dry, airy crunch that contrasts with the creamy interior; choose semi-sweet chocolate for a balanced bite or dark chocolate if you prefer bitterness to offset sugar.
Timing:
Prep time: 20 minutes. Chill time (firming filling): 45–60 minutes. Dipping & finish: 15–20 minutes. Total time: about 90 minutes, which is often 15–25% faster than many homemade truffle or candy recipes that require longer tempering or multiple chill cycles. If you’re short on time, a 30-minute freezer chill can accelerate the process, but allow a few minutes at room temperature before dipping to avoid cracking.
Step 1 — Prep and crush the candy:
Place Butterfinger bars in a heavy-duty zip-top bag and crush with a rolling pin or pulse 2–3 times in a food processor to create a mix of fine crumbs and larger flakes. Aim for a variety of particle sizes to retain that signature airy crunch.
Tip: Reserve 2–3 tablespoons of the largest flakes to press into the outside of truffles after coating for visual appeal and extra texture.
Step 2 — Make the chocolate-Butterfinger filling:
In a medium bowl, beat the softened cream cheese with vanilla and a pinch of salt until smooth. Gently fold in the crushed Butterfinger pieces until evenly distributed; don’t overmix — you want flakes intact. Taste and adjust: if the filling feels too wet, add 1–2 tablespoons more crushed candy or refrigerate to firm up.
Tip: For a slightly firmer, firmer center (easier to roll), fold in 1–2 tbsp of crushed graham cracker or almond flour without changing the flavor profile much.
Step 3 — Chill and portion the centers:
Scoop the filling into tablespoon-sized portions using a small cookie scoop for uniformity. Place scoops on a parchment-lined tray, flatten slightly if desired, and chill for 45–60 minutes (or freeze 20–30 minutes) until firm enough to handle.
Tip: Portioning while slightly frozen makes rolling smoother; wear plastic gloves to prevent melting from body heat.
Step 4 — Roll centers and pre-chill if needed:
Quickly roll each portion into a smooth ball between your palms, then set back on the tray. If your kitchen is warm, pop them into the fridge for 10 minutes before coating to prevent melting during dipping.
Tip: If filling crumbles, press gently and re-chill; minor cracks will be hidden by the chocolate shell.
Step 5 — Melt and prepare chocolate coating:
Use a double boiler or microwave (30-second bursts, stirring between intervals) to melt chocolate with 1 tbsp neutral oil if using. Stir until glossy and fully smooth. Keep melted chocolate warm in a small bowl set over a barely-warm water bath to maintain fluidity for dipping.
Tip: If the chocolate becomes too thick, stir in a teaspoon of oil or a small piece of coconut oil until you reach a smooth, coatable consistency. Avoid overheating (keep below 115°F / 46°C for dark chocolate).
Step 6 — Dip and finish:
Using a fork or dipping tool, submerge each truffle into the melted chocolate, tap gently to remove excess, then set back on parchment. Immediately press reserved Butterfinger flakes or a pinch of flaky sea salt on top before the coating sets.
Tip: Use two forks to roll and lift — this reduces fingerprints and creates a smoother finish. For decorative drizzle, thin a small portion of white chocolate and zigzag over the set truffles.
Nutritional Information:
Estimated per truffle (makes ~24 truffles; values approximate): Calories: 130–170 kcal; Fat: 8–11 g; Saturated fat: 4–6 g; Carbohydrates: 12–16 g; Sugars: 10–13 g; Protein: 1–2 g; Fiber: 0.5–1 g. Insights: The candy and chocolate are the primary calorie drivers; swapping to dark chocolate reduces sugar content per serving but may increase perceived richness, helping you enjoy smaller portions. For precise tracking, weigh final yield and input into a nutrition calculator based on exact brands used.
Healthier Alternatives for the Recipe:
- Lower-sugar: Use 60–70% dark chocolate and reduce the amount of crushed candy by 25%, replacing volume with roasted, finely chopped peanuts or almond flour for texture.
- Dairy-free/vegan: Substitute cream cheese with full-fat vegan cream cheese (coconut- or cashew-based) and use vegan chocolate chips. Note: texture will be creamier and less tangy; adding 1 tsp lemon juice replicates the tang.
- Lower-fat: Use light cream cheese and a smaller amount of chocolate for partial coating (half-dipped truffles). Expect a softer center and slightly different mouthfeel.
- Nut-free: If peanut is a concern, choose a Butterfinger-style candy that’s nut-free or replace with allergen-friendly crunchy toffee; always check labels to ensure safety.
Serving Suggestions:
Serve chilled or at cool-room temperature on a decorative platter with contrasting textures: pair with salted pretzel sticks, roasted almonds, or mini marshmallows. These truffles are giftable—arrange in mini paper cups and box them with a ribbon. For a party, display on a tiered tray alongside dark chocolate bark and citrus-spiked truffles to balance sweetness. Personalization idea: create themed toppings (pink sanding sugar for Valentine’s, edible gold dust for holiday gifts).
Common Mistakes to Avoid:
- Over-crushing the candy: Excessively fine crumbs eliminate crunch. Aim for mixed particle sizes.
- Dipping centers that are too warm: Warm centers melt and create cracks in the shell; always chill adequately.
- Overheating chocolate: Burns the cocoa butter, causing grainy, dull coating — melt gently and avoid microwaving without stirring.
- Skipping the oil (if needed) when coating: Thick chocolate may produce a lumpy shell; a small amount of neutral oil improves flow and sheen.
- Using low-fat cream cheese without adjusting chilling time: Lower-fat versions are softer; add extra chill time or a bit of almond flour to firm up.
Storing Tips for the Recipe:
Store truffles in an airtight container in the refrigerator for up to 10–14 days; place wax paper between layers to prevent sticking. For longer storage, freeze on a tray until solid, then transfer to a freezer-safe container for up to 3 months; thaw in the refrigerator overnight to preserve texture. Avoid leaving truffles at room temperature for extended periods—the chocolate can bloom (white streaks) if exposed to temperature fluctuations, which is harmless but reduces gloss.
Conclusion:
These Butterfinger Chocolate Truffles deliver that signature crunchy, peanut-butter-candy experience in elegant, bite-size form with flexible timing and swap-friendly ingredients to fit many diets. The key wins are texture contrast, simple shaping, and a glossy chocolate shell—each achievable without specialized equipment. Try the recipe, experiment with dark chocolate or vegan cream cheese versions, and share photos or variations to help others discover the best crunch-to-cream ratio.
FAQs:
Q: How many truffles does this recipe make? A: Approximately 20–28 truffles depending on portion size; using a 1-tablespoon scoop yields about 24.
Q: Can I use store-bought Butterfinger pieces straight from the package? A: Yes—crush them to a mix of fine crumbs and larger flakes. Avoid using pre-crushed candy dust only, as you’ll lose crunch.
Q: Do I need to temper the chocolate? A: No—tempering isn’t required for home use if you add a small amount of oil for shine and chill properly. Tempering will give the best snap and shelf stability if you plan to store at room temperature.
Q: Can I make the truffle centers ahead? A: Yes—make and chill centers up to 3 days ahead, kept refrigerated, or freeze for longer storage. Dip just before serving for optimal texture.
Q: Are these safe for people with nut allergies? A: Butterfinger contains peanut flavoring and may be manufactured in facilities processing peanuts; check package labels carefully and choose an allergen-safe crunchy candy if needed.
Want variations or printable measurements for a different yield? Tell me how many truffles you want and whether you need a vegan or lower-sugar version, and I’ll scale the recipe and provide exact shopping quantities and step-by-step timing optimized for your kitchen.
Butterfinger Chocolate Truffles
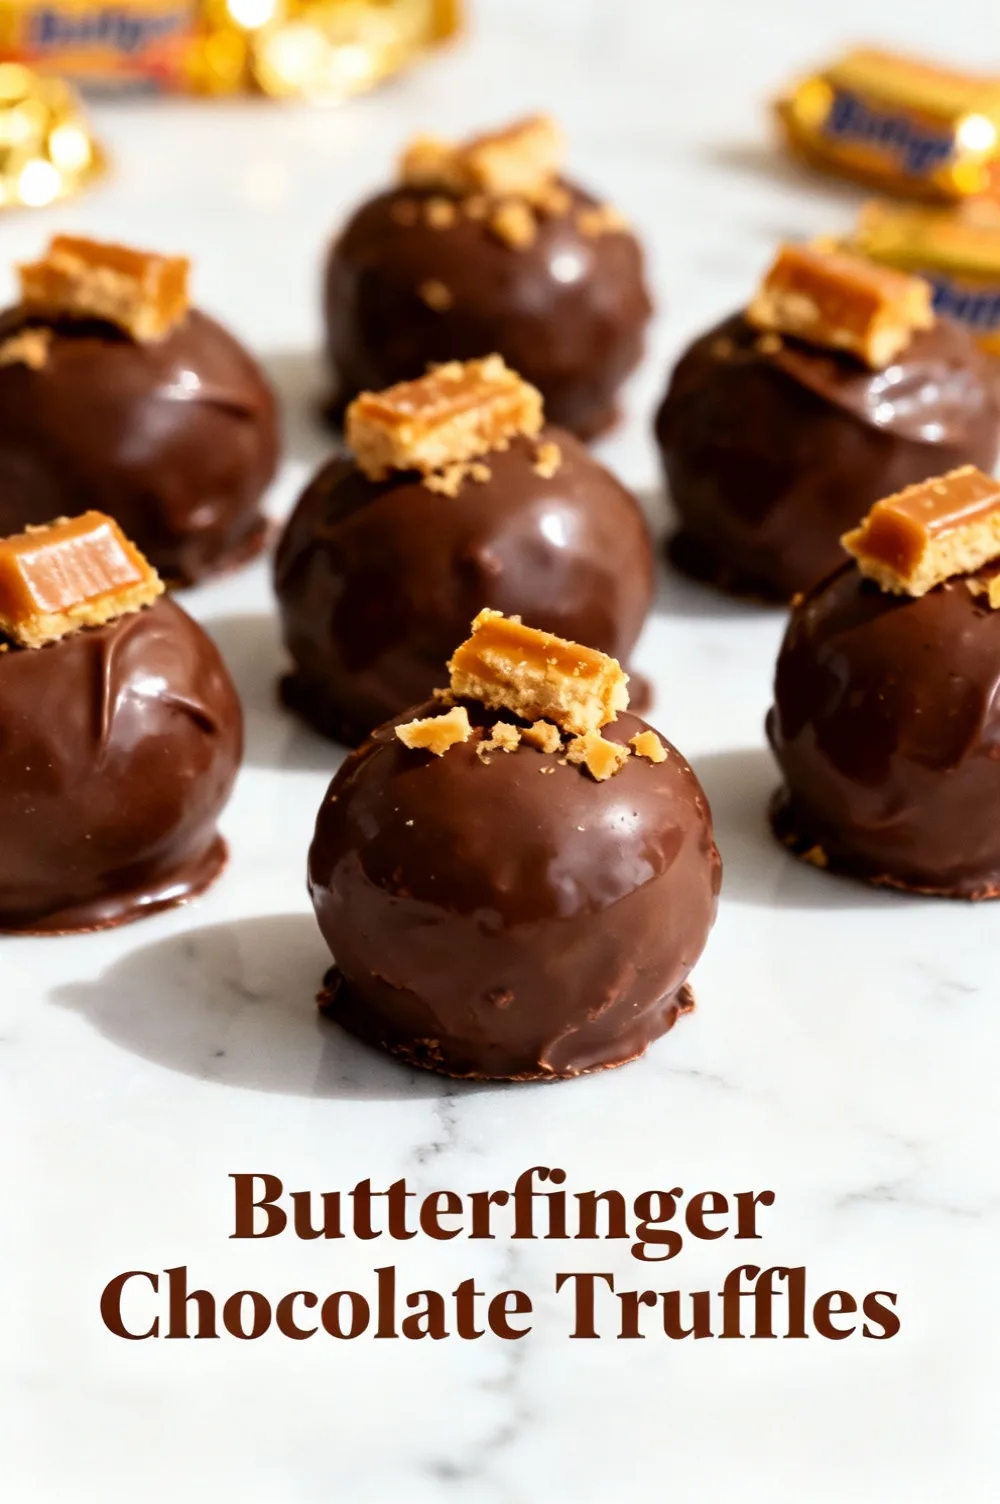
Crunchy Butterfinger pieces wrapped in creamy truffle centers and coated in chocolate — an easy, no‑bake treat.
Ingredients
- 10–12 fun‑size Butterfinger bars (about 2 cups), coarsely chopped or crushed
- 8 oz (225 g) cream cheese, softened to room temperature
- 1/2 tsp vanilla extract
- Pinch of salt
- 12 oz (340 g) semisweet or milk chocolate chips (or chopped baking chocolate), for coating
- 1 tsp neutral oil or coconut oil (optional, for smoother melted chocolate)
- Extra crushed Butterfinger or sprinkles for garnish (optional)
Instructions
- Prepare candy: Place the Butterfinger pieces in a food processor and pulse until you have mostly fine crumbs with a few small crunchy bits remaining. If you don’t have a processor, place pieces in a ziptop bag and crush with a rolling pin.
- Mix filling: In a medium bowl, combine the crushed Butterfinger, softened cream cheese, vanilla extract and a pinch of salt. Stir or beat with a spoon/hand mixer until fully combined and smooth; the mixture should be moldable.
- Form truffles: Using a small cookie scoop or tablespoon, portion the mixture and roll into 1‑inch (about 2.5 cm) balls with lightly greased hands. Place the formed balls on a parchment‑lined baking sheet.
- Chill: Refrigerate the truffle centers for at least 1 hour (or freeze 15–20 minutes) so they firm up and are easier to dip.
- Melt chocolate: In a microwave‑safe bowl, melt the chocolate chips in 20–30 second bursts, stirring between each, until smooth. Stir in the oil if using to thin the chocolate slightly. Alternatively, melt the chocolate in a heatproof bowl over a pan of simmering water (double boiler).
- Dip truffles: Working quickly, use a fork or dipping tool to coat each chilled truffle with melted chocolate, letting excess drip back into the bowl. Place coated truffles back on the parchment. If desired, sprinkle crushed Butterfinger or sprinkles on top before the chocolate sets.
- Set: Refrigerate the coated truffles for 20–30 minutes, or until the chocolate is firm.
- Store: Keep truffles refrigerated in an airtight container for up to 1 week, or freeze for longer storage. Bring to room temperature a few minutes before serving for best texture.
Nutrition Information
- Calories: 150 kcal
- Cholesterol: 20 mg
- Sodium: 45 mg
- Carbohydrates: 15 g
- Fiber: 1 g
- Sugar: 12 g
- Protein: 2 g